Here I added dimitri's submarines along with the battleships and our buildings.
Once I did this I had my finished Environment.
Once I had everything in place I had to add the group models into my environment to finish it off.
Here i added Joels battleships and Eva's dock.
Here I created the daylight system for our environment. To do this I manually set it up to get the horizon line in the correct place you can see from the image below.
To get the horizon in the right place I had to move the compass to the right level so when rendering it would show the horizon correctly.
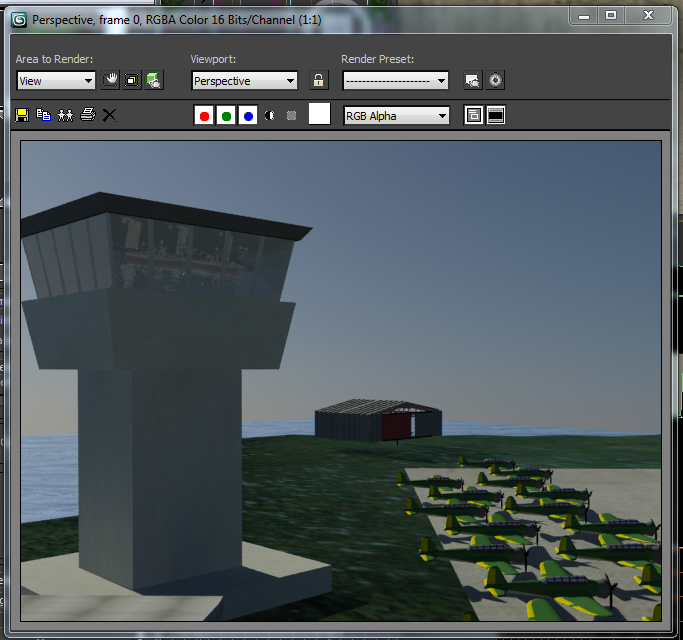
Here I modelled a communication tower for my environment.
Here I modelled a hangar to go in my environment.
Once I had the basic layout of my harbor, along with the water and the grass I could start modelling buildings into the environments. To do this I created a basic building using a simple building texture onto a plane, and then using the quickslice and extrude tool added the detail to the building.
I then added these and other buildings my group mates had constructed to the environment.
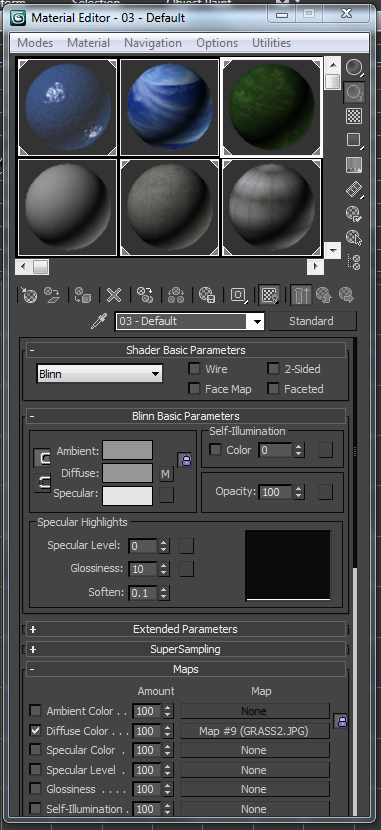
To add my grass texture I used a pre-set texture within 3D Studio Max. I added a bump map to the texture the same way I did with my realistic water. You can see below.
Once I had my water modelled I added it to my environment.
To add the water to my environment I placed the water plane over the island plane. I lined them up so it looks like the islands are sticking out of the water and then I grouped them together.
Now that I have the layout of my harbor I have to create water for the surrounding islands. To do this I used a very simple technique using a plane. First I created a plane and then opened the material editor. In the material editor I go to the maps tab and add a bump tab to my material.
 Once I did this I add my bitmap image to the material. For this I click on the bump tab and add my bitmap. I loaded a preset material from 3ds max for my water and then tweaked the settings. Once I have loaded the preset material I go to the tiling setting and change it to 2.0. Once I did this I go to the additional bump tab and add another normal bump, you can see this in the image to the right. I repeat this procedure two more times and every time doubling the tiling, so from 2.0 to 4.0 until it reaches 8.0.
Once I did this I added my water material to my plane and had a look to see how it was looking.
As you can see from the image to the left my plane is now starting to look like water, however it does not have a reflection like water usually does. To get a good water reflection I go back to the maps tab and add a reflection map. As you can see from the top left image I added a raytrace to my reflection map to add a shine to my reflection.
Once I did this I created a sphere to go round my water. I did this as the sphere will be my sky which is reflected on by the water. To do this I created a sphere around my water and then added a normal modifier to it which flips it inside out. Once I did this I added a sky material to the sphere which I loaded from the presets. Once I completed this I rendered out my water to see what it looked like. As you can see from the image to the right my water is looking very realistic. Once I did this I added it to Pearl Harbor environment.
Once I did this I add my bitmap image to the material. For this I click on the bump tab and add my bitmap. I loaded a preset material from 3ds max for my water and then tweaked the settings. Once I have loaded the preset material I go to the tiling setting and change it to 2.0. Once I did this I go to the additional bump tab and add another normal bump, you can see this in the image to the right. I repeat this procedure two more times and every time doubling the tiling, so from 2.0 to 4.0 until it reaches 8.0.
Once I did this I added my water material to my plane and had a look to see how it was looking.
As you can see from the image to the left my plane is now starting to look like water, however it does not have a reflection like water usually does. To get a good water reflection I go back to the maps tab and add a reflection map. As you can see from the top left image I added a raytrace to my reflection map to add a shine to my reflection.
Once I did this I created a sphere to go round my water. I did this as the sphere will be my sky which is reflected on by the water. To do this I created a sphere around my water and then added a normal modifier to it which flips it inside out. Once I did this I added a sky material to the sphere which I loaded from the presets. Once I completed this I rendered out my water to see what it looked like. As you can see from the image to the right my water is looking very realistic. Once I did this I added it to Pearl Harbor environment.
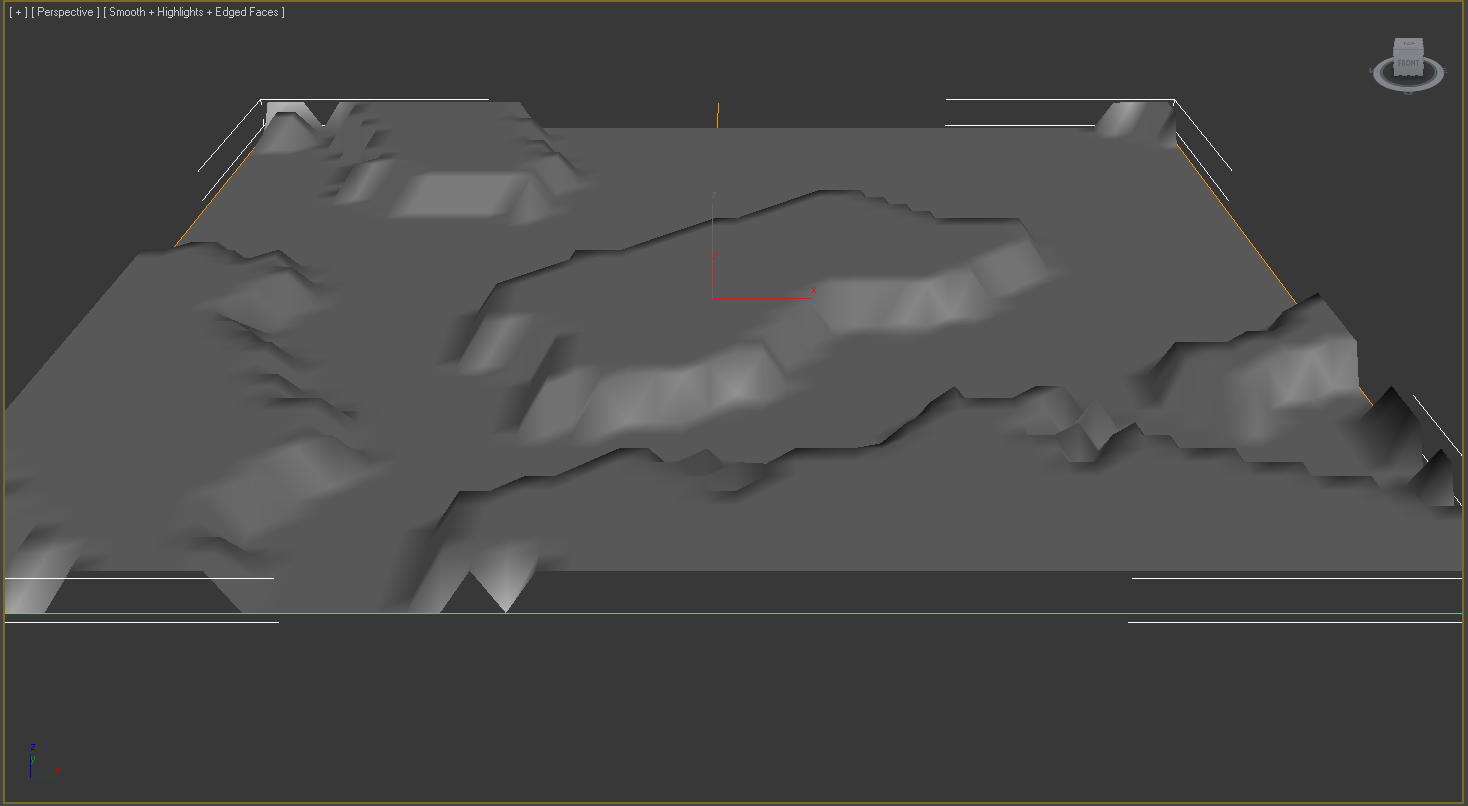
 Once I had my height map I could start modelling the harbor. To do this I created a plane which I added a displace modifier too. This is where the height map comes into play. Once I have added the displace modifier too the plane I add my height map to the displace modifier.
To do this I have to go to the displace modifier and under the parameters tab find the image section and add my bitmap image by clicking on none. When I click none it gives me the option to add a image from my computer. The image I will use will be the height map that I have saved to my computer.
Once I had my height map I could start modelling the harbor. To do this I created a plane which I added a displace modifier too. This is where the height map comes into play. Once I have added the displace modifier too the plane I add my height map to the displace modifier.
To do this I have to go to the displace modifier and under the parameters tab find the image section and add my bitmap image by clicking on none. When I click none it gives me the option to add a image from my computer. The image I will use will be the height map that I have saved to my computer.
 Once I have added the height map to the image section I have to increase the strength to bring up the layout of the harbor. Once I've incresed the strength it brings up the layout of the harbor as you can see from image below.
Once I have the layout of the harbor I can start modelling buildings and textures to create Pearl Harbor. I also have to add water to the harbor which will be my next step.
Once I have added the height map to the image section I have to increase the strength to bring up the layout of the harbor. Once I've incresed the strength it brings up the layout of the harbor as you can see from image below.
Once I have the layout of the harbor I can start modelling buildings and textures to create Pearl Harbor. I also have to add water to the harbor which will be my next step.
To create a height map I used Photoshop. To do this I used one of the maps of Pearl Harbor to get the layout of the environment. Once I had the layout imported into Photoshop I created my height map. To do this I made the high ground a light color and the low ground a dark color. For this technique to work its best to use black to white, so low ground will be shaded in black and the high ground either white or a light grey.
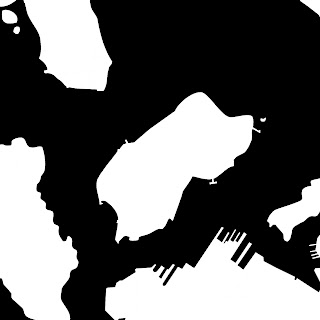 Here is a height map I had created to import into 3ds Max.
The height map to the right created a basic layout of the harbor. I had to simplify the shape of the islands by taking out the surrounding docks and making a really simple outline of the islands.
I had to simplify the outline because when using this height map in 3Ds max it was obscuring the outline of the islands and not giving me an accurate shape. The image to the left is the simplified height map which I then imported into 3D studio max.
Here is a height map I had created to import into 3ds Max.
The height map to the right created a basic layout of the harbor. I had to simplify the shape of the islands by taking out the surrounding docks and making a really simple outline of the islands.
I had to simplify the outline because when using this height map in 3Ds max it was obscuring the outline of the islands and not giving me an accurate shape. The image to the left is the simplified height map which I then imported into 3D studio max.


 Once I did this I add my bitmap image to the material. For this I click on the bump tab and add my bitmap. I loaded a preset material from 3ds max for my water and then tweaked the settings. Once I have loaded the preset material I go to the tiling setting and change it to 2.0. Once I did this I go to the additional bump tab and add another normal bump, you can see this in the image to the right. I repeat this procedure two more times and every time doubling the tiling, so from 2.0 to 4.0 until it reaches 8.0.

 Once I had my height map I could start modelling the harbor. To do this I created a plane which I added a displace modifier too. This is where the height map comes into play. Once I have added the displace modifier too the plane I add my height map to the displace modifier.
 Once I have added the height map to the image section I have to increase the strength to bring up the layout of the harbor. Once I've incresed the strength it brings up the layout of the harbor as you can see from image below.